How to Downgrade WordPress to a Previous Version. Error when upgrading WordPress? To fix this, you can downgrade WordPress to a previous version!
One of the most common problems with having a WordPress website is that it’s often difficult to update the WordPress core.
WordPress itself updates regularly, both minor and major updates. Unfortunately, these updates can sometimes cause problems, especially when they conflict with the themes or plugins we use.
This recently happened to one of my blogs. Since it had been neglected for a while, I had just updated almost all of my plugins. And when I got the notification to update WordPress core, I did so without checking first.
Since these updates had been around for a while, I thought it was safe to update everything immediately. But I was wrong! Nothing was wrong at first glance. I was able to access all the menus in the WordPress dashboard without any problems. But when I tried to create a new post, I got the error message below.
Solving this problem was easy. I just need to find the plugin that conflicts with the WordPress core update and uninstall it or replace it with another plugin.
Unfortunately, this is too much trouble. I think downgrading WordPress to a previous version would be a better option.
How to Rollback/Downgrade WordPress to an Older Version
To downgrade WordPress to a previous version, we don’t need to do it manually, but if you want to know, then I will provide the steps at the end of this post.
Before we downgrade WordPress, it’s a good idea to make a backup first. Also, make sure your plugins and WordPress core are actually working on the previous version.
1. Create a WordPress Backup
As always, before tinkering with WordPress, it’s a good idea to take a backup. That way, if something goes wrong, you can always go back to the drawing board.
To create a WordPress backup, use one of the best WordPress backup plugins like Updraft. One click is all it takes to create a backup. You can even save your backups directly to cloud storage like Google Drive or Dropbox.
Once you’ve created a backup, it’s time to downgrade WordPress to an older version.
2. Downgrade WordPress with Plugins
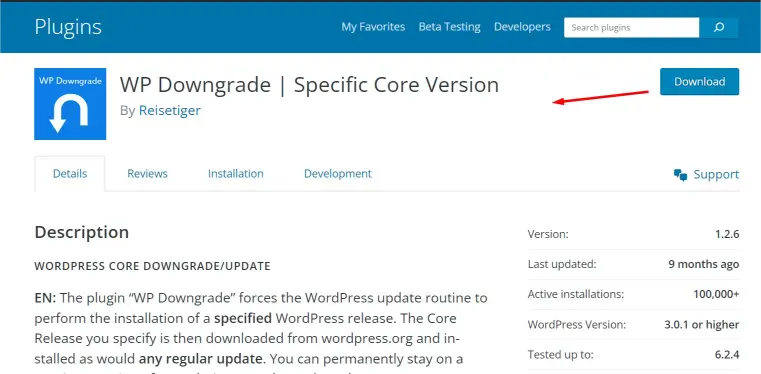
The best plugin to help us downgrade WordPress is Reisetiger’s WP Downgrade.
This plugin works by tricking WordPress into thinking an older version of WordPress is the latest update. This way, WordPress will show it on your dashboard and you can install it just like a normal WordPress update.
Read: How to Migrate WordPress from Hosting to Other Hosting
To do this,
- Login to your WordPress dashboard and go to PLUGINS ► ADD NEW
- Search for WP Downgrade then install and activate the plugin
- Once installed, go to SETTINGS ► WP DOWNGRADE
- In the WORDPRESS TARGET VERSION field, fill in the WordPress version you want to install. If you have problems like me above, it’s a good idea to
- downgrade WordPress to the latest version before an error occurs. Check WP Release to see the previous WordPress serial number.
If so, click the SAVE CHANGES button
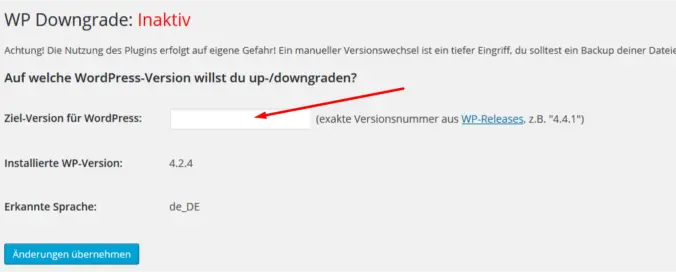
Downgrade WordPress to an older version with the WP Downgrade plugin
- Once done, there will be a notification from WP Downgrade. Check the DASHBOARD ► UPDATES menu to start downgrading WordPress.
- Click the RE-INSTALL NOW button to downgrade WordPress to the old version. If so, our WordPress installation will return to the old version we chose.
3. Downgrade WordPress Manually
Honestly, this method is more complicated than using a plugin. But if you prefer this method or are just curious, it’s worth a try.
To do this,
- As always, backup your WordPress before you start. After that, download the version of WordPress you want from the WP Release page.
- Turn off plugins and log out of WordPress.
- Log in to cPanel or FTP and delete the wp-admin and wp-includes folders. Be careful not to delete the wp-content folder so you don’t lose your previous website data.
- After that, extract the downloaded WordPress file.
- Copy all files except the wp-content folder
- Once you’ve done that, check your wp-config.php file again and connect your WordPress website to your old database. Done
As you can see, reverting to an older version of WordPress is very easy to do, especially if you use the WP Downgrade plugin. I’ve tried it myself, and I’ve successfully reverted to an older version of WordPress in just a few steps.
But make sure you know what you’re doing. Don’t forget to make a backup just in case something goes wrong.


